Python Gtk
最后修改于 2024 年 1 月 29 日
Python Gtk 教程展示了如何使用 Gtk 模块在 Python 中创建 GUI 应用程序。本教程涵盖 GTK 4。
GTK
GTK 是一个用于创建图形用户界面的多平台工具包。它使用 C 语言创建。GTK 从一开始就被设计为支持多种语言,包括 Python、Ruby 和 Perl。
GTK 库也称为 GIMP 工具包。最初,该库是在开发 GIMP 图像处理程序时创建的。从那时起,GTK 成为 Linux 和 BSD Unix 下最流行的工具包之一。
#!/usr/bin/python

import gi
gi.require_version('Gtk', '4.0')
from gi.repository import Gtk

print(f'{Gtk.MAJOR_VERSION}.{Gtk.MINOR_VERSION}.{Gtk.MICRO_VERSION}')
我们通过语言自省访问 GTK 库。PyGObject 是 C 库的语言接口。
import gi
gi.require_version('Gtk', '4.0')
from gi.repository import Gtk
我们导入 Gtk 模块。require_version 方法确保使用给定的版本加载命名空间。gi.repository 是 PyGObject 的 Python 模块。PyGObject (Python GObject 自省) 包含 Python 绑定,并支持 GObject、GLib、GTK 和其他库。
$ ./version.py
4.6.5
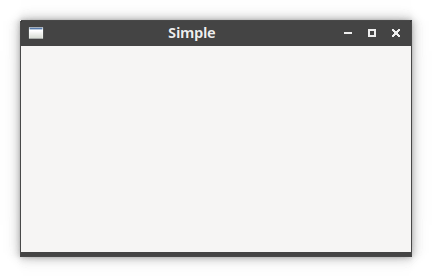
Python Gtk 简单示例
在第一个应用程序中,我们在屏幕上显示一个窗口。Gtk.Window 是一个可以包含其他小部件的顶层窗口。换句话说,它是一个容器。窗口通常具有受窗口系统控制的装饰,允许用户操作窗口。
#!/usr/bin/python

import gi
gi.require_version('Gtk', '4.0')
from gi.repository import Gtk


def on_activate(app):

    win = Gtk.ApplicationWindow(application=app)
    win.set_title('Simple')
    win.present()


app = Gtk.Application(application_id='com.zetcode.Simple')
app.connect('activate', on_activate)
app.run(None)
该示例在屏幕上显示一个小窗口。
def on_activate(app):

    win = Gtk.ApplicationWindow(application=app)
    win.set_title('Simple')
    win.present()
我们在 on_activate 函数中创建主应用程序窗口。我们使用 set_title 设置应用程序的标题,并使用 present 将其呈现给用户。
app = Gtk.Application(application_id='com.zetcode.Simple')
app.connect('activate', on_activate)
app.run(None)
我们创建一个新的 Gtk.Application。要设置应用程序,我们连接到 activate 信号,该信号在发生应用程序激活时发出。run 函数运行应用程序。
在下一个示例中,我们以 OOP 风格重写该示例。
#!/usr/bin/python

import gi
gi.require_version('Gtk', '4.0')
from gi.repository import Gtk

class AppWindow(Gtk.ApplicationWindow):

    def __init__(self, app):

        super(AppWindow, self).__init__(application=app)

        self.init_ui()

    def init_ui(self):

        self.set_title('Simple')
        self.set_default_size(350, 250)


def on_activate(app):

    win = AppWindow(app)
    win.present()


app = Gtk.Application(application_id='com.zetcode.Simple')
app.connect('activate', on_activate)
app.run(None)
我们创建一个从 Gtk.ApplicationWindow 继承的类。我们在 init_ui 库中构建 UI。
self.set_default_size(350, 250)
使用 set_default_size 函数,我们设置应用程序窗口的默认大小。
Python Gtk.Image
Gtk.Image 显示一个图像。如果文件未成功加载,则图像将包含一个“损坏图像”图标。
#!/usr/bin/python

import gi
gi.require_version('Gtk', '4.0')
from gi.repository import Gtk

class AppWindow(Gtk.ApplicationWindow):

    def __init__(self, app):

        super(AppWindow, self).__init__(application=app)

        self.init_ui()

    def init_ui(self):

        self.set_title('Image')

        image = Gtk.Image.new_from_file('sid.png')

        self.set_child(image)
        self.set_default_size(450, 350)


def on_activate(app):

    win = AppWindow(app)
    win.present()


app = Gtk.Application(application_id='com.zetcode.Image')
app.connect('activate', on_activate)
app.run(None)
该示例在窗口上显示一个 PNG 图像。
image = Gtk.Image.new_from_file('sid.png')
Gtk.Image 是从文件创建的。
self.set_child(image)
我们将图像设置为应用程序窗口的主容器。
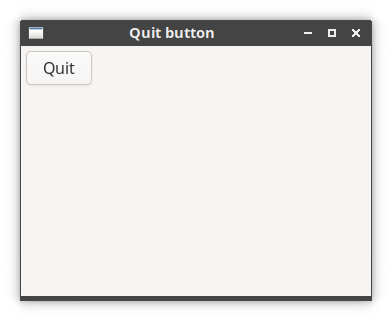
Python Gtk.Button
Gtk.Button 用于触发在按下按钮时调用的回调函数。
#!/usr/bin/python

import gi
gi.require_version('Gtk', '4.0')
from gi.repository import Gtk


class AppWindow(Gtk.ApplicationWindow):

    def __init__(self, app):

        super(AppWindow, self).__init__(application=app)

        self.init_ui()

    def init_ui(self):

        self.set_title('Quit button')

        box = Gtk.Box.new(Gtk.Orientation.VERTICAL, 0)
        box.set_margin_start(5)
        box.set_margin_top(5)

        btn = Gtk.Button(label="Quit")
        btn.connect('clicked', lambda _: self.close())

        btn.set_halign(Gtk.Align.START)
        box.append(btn)

        self.set_default_size(350, 250)
        self.set_child(box)


def on_activate(app):

    win = AppWindow(app)
    win.present()


app = Gtk.Application(application_id='com.zetcode.QuitButton')
app.connect('activate', on_activate)
app.run(None)
在该示例中,我们有一个按钮。当我们按下按钮时,应用程序终止。
box = Gtk.Box.new(Gtk.Orientation.VERTICAL, 0)
box.set_margin_start(5)
box.set_margin_top(5)
我们创建一个垂直框。我们在框的左侧和顶部放置一些边距。Gtk.Box 是一个简单的布局小部件,它按行或列排列小部件。
btn = Gtk.Button(label="Quit")
创建一个 Gtk.Button。
btn.connect('clicked', lambda _: self.close())
单击按钮时,它会发出一个 clicked 信号。使用 connect 方法,我们将信号绑定到 self.close 方法。
btn.set_halign(Gtk.Align.START)
box.append(btn)
我们将按钮与框的左侧对齐,并将其添加到垂直框中。
self.set_default_size(350, 250)
self.set_child(box)
最后,我们设置应用程序窗口的默认大小,并将垂直框添加到窗口容器中。
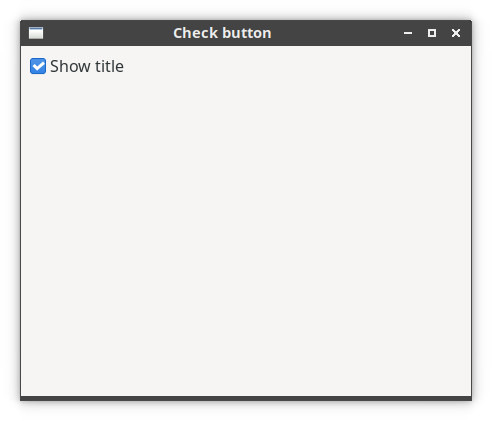
Python Gtk.CheckButton
Gtk.CheckButton 是一个具有两种状态的小部件:开和关。开状态由复选标记可视化。
#!/usr/bin/python

import gi
gi.require_version('Gtk', '4.0')
from gi.repository import Gtk


class AppWindow(Gtk.ApplicationWindow):

    def __init__(self, app):

        super(AppWindow, self).__init__(application=app)

        self.init_ui()

    def init_ui(self):

        self.set_title('Check button')

        box = Gtk.Box.new(Gtk.Orientation.VERTICAL, 0)
        box.set_margin_start(5)
        box.set_margin_top(5)

        cbtn = Gtk.CheckButton.new_with_label('Show title')
        cbtn.set_active(True)
        cbtn.connect('toggled', self.on_toggle)

        box.append(cbtn)

        self.set_child(box)
        self.set_default_size(450, 350)

    def on_toggle(self, wid):

        if wid.get_active():
            self.set_title('CheckButton')
        else:
            self.set_title('')


def on_activate(app):

    win = AppWindow(app)
    win.present()


app = Gtk.Application(application_id='com.zetcode.CheckButton')
app.connect('activate', on_activate)
app.run(None)
该示例在窗口的标题栏中显示一个标题,具体取决于 Gtk.CheckButton 的状态。
cbtn = Gtk.CheckButton.new_with_label('Show title')
cbtn.set_active(True)
创建 Gtk.CheckButton。由于默认情况下窗口的标题是可见的,因此我们使用 set_active 激活按钮。
cbtn.connect('toggled', self.on_toggle)
当我们选中或取消选中 Gtk.CheckButton 时,会发出 toggled 信号。我们将 on_toggle 处理程序插入到信号中。
def on_toggle(self, wid):

    if wid.get_active():
        self.set_title('CheckButton')
    else:
        self.set_title('')
我们使用 get_active 确定 Gtk.CheckButton 的状态,并相应地设置标题。
按下的键事件
下一个示例响应 key-pressed 事件。
#!/usr/bin/python

import gi
from gi.repository import Gtk
gi.require_version("Gtk", "4.0")

class AppWindow(Gtk.ApplicationWindow):

    def __init__(self, app):

        super(AppWindow, self).__init__(application=app)

        self.init_ui()

    def init_ui(self):

        self.set_title('Key press')

        keycont = Gtk.EventControllerKey()
        keycont.connect('key-pressed', self.on_key_pressed)
        self.add_controller(keycont)

        self.set_default_size(350, 250)

    # keyval, keycode, state, user_data
    def on_key_pressed(self, keyval, keycode, *_):

        if keycode == ord('q'):
            self.close()


def on_activate(app):

    win = AppWindow(app)
    win.present()


app = Gtk.Application(application_id='com.zetcode.KeyPress')
app.connect('activate', on_activate)
app.run(None)
应用程序侦听按键事件。如果用户输入 q 键,则应用程序终止。
keycont = Gtk.EventControllerKey()
keycont.connect('key-pressed', self.on_key_pressed)
self.add_controller(keycont)
我们创建并注册 Gtk.EventControllerKey。我们连接到 key-pressed 信号。
# keyval, keycode, state, user_data
def on_key_pressed(self, keyval, keycode, *_):

    if keycode == ord('q'):
        self.close()
我们检查键码。如果是 q,我们关闭应用程序。
Python Gtk.Entry
Gtk.Entry 小部件是一个单行文本输入小部件。默认情况下支持许多键绑定。如果输入的文本长度超过小部件的分配,小部件将滚动以使光标位置可见。
#!/usr/bin/python

import gi
gi.require_version('Gtk', '4.0')
from gi.repository import Gtk


class AppWindow(Gtk.ApplicationWindow):

    def __init__(self, app):

        super(AppWindow, self).__init__(application=app)

        self.init_ui()

    def init_ui(self):

        self.set_title('Quit button')

        vbox = Gtk.Box.new(Gtk.Orientation.VERTICAL, 8)
        hbox = Gtk.Box.new(Gtk.Orientation.HORIZONTAL, 8)

        vbox.set_margin_start(5)
        vbox.set_margin_top(5)

        self.entry = Gtk.Entry()
        hbox.append(self.entry)

        keycont = Gtk.EventControllerKey()
        keycont.connect('key-released', self.on_key_released)
        self.add_controller(keycont)

        self.label = Gtk.Label.new('...')
        hbox.append(self.label)

        self.set_title('Entry')
        self.set_default_size(450, 350)

        vbox.append(hbox)
        self.set_child(vbox)


    def on_key_released(self, *_):
        self.label.set_text(self.entry.get_text())


def on_activate(app):

    win = AppWindow(app)
    win.present()


app = Gtk.Application(application_id='com.zetcode.QuitButton')
app.connect('activate', on_activate)
app.run(None)
在该示例中,我们有一个输入小部件和一个标签。输入到条目中的文本显示在标签中。
vbox = Gtk.Box.new(Gtk.Orientation.VERTICAL, 8)
hbox = Gtk.Box.new(Gtk.Orientation.HORIZONTAL, 8)
该布局是通过垂直和水平框的组合创建的。
self.entry = Gtk.Entry()
我们创建 Gtk.Entry 小部件。
keycont = Gtk.EventControllerKey()
keycont.connect('key-released', self.on_key_released)
self.add_controller(keycont)
为了能够处理键事件,我们创建一个 Gtk.EventControllerKey。我们对 on_key_released 事件做出反应。
def on_key_released(self, *_):
    self.label.set_text(self.entry.get_text())
在 on_key_released 事件处理程序中,我们使用 get_text 从条目中获取文本,并使用 set_text 将其设置为标签。
Python Gtk.ComboBoxText
Gtk.ComboBoxText 是 Gtk.ComboBox 的一个简单变体,它隐藏了简单文本用例的模型视图复杂性。
#!/usr/bin/python

import gi
gi.require_version('Gtk', '4.0')
from gi.repository import Gtk


class AppWindow(Gtk.ApplicationWindow):

    def __init__(self, app):

        super(AppWindow, self).__init__(application=app)

        self.init_ui()

    def init_ui(self):

        self.set_title('Quit button')

        vbox = Gtk.Box.new(Gtk.Orientation.VERTICAL, 8)
        hbox = Gtk.Box.new(Gtk.Orientation.HORIZONTAL, 8)

        combo = Gtk.ComboBoxText()

        vbox.set_margin_start(5)
        vbox.set_margin_top(5)
        hbox.append(combo)

        combo.connect('changed', self.on_changed)

        combo.append_text('Arch')
        combo.append_text('Fedora')
        combo.append_text('Redhat')
        combo.append_text('Gentoo')
        combo.append_text('Xubuntu')

        self.label = Gtk.Label.new('')
        hbox.append(self.label)

        self.set_title('ComboBoxText')
        self.set_default_size(450, 350)

        vbox.append(hbox)
        self.set_child(vbox)

    def on_changed(self, wid):

        self.label.set_label(wid.get_active_text())


def on_activate(app):

    win = AppWindow(app)
    win.present()


app = Gtk.Application(application_id='com.zetcode.ComboBoxText')
app.connect('activate', on_activate)
app.run(None)
在该示例中,我们有一个 Gtk.ComboBoxText 和一个标签。从组合框中选择的项目显示在标签小部件中。
combo = Gtk.ComboBoxText()
创建 Gtk.ComboBoxText。
combo.connect('changed', self.on_changed)
当活动项目更改时,会发出 changed 信号。
combo.append_text('Arch')
combo.append_text('Fedora')
combo.append_text('Redhat')
combo.append_text('Gentoo')
combo.append_text('Xubuntu')
我们向组合框添加五个文本项。
def on_changed(self, wid):

    self.label.set_label(wid.get_active_text())
在 on_changed 事件处理程序中,我们使用 get_active_text 获取活动文本,并使用 set_label 将其设置为标签。

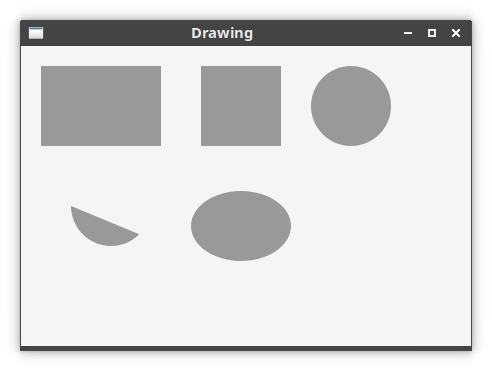
绘图
绘图是在 Gtk.DrawingArea 小部件上完成的。
#!/usr/bin/python

import gi
gi.require_version('Gtk', '4.0')
import math
from gi.repository import Gtk


class AppWindow(Gtk.ApplicationWindow):

    def __init__(self, app):

        super(AppWindow, self).__init__(application=app)

        self.init_ui()

    def init_ui(self):

        self.set_title('Drawing')

        area = Gtk.DrawingArea.new()
        area.set_draw_func(self.on_draw)

        self.set_default_size(450, 300)
        self.set_child(area)


    def on_draw(self, da, ctx, w, h):

        ctx.set_source_rgb(0.6, 0.6, 0.6)

        ctx.rectangle(20, 20, 120, 80)
        ctx.rectangle(180, 20, 80, 80)
        ctx.fill()

        ctx.arc(330, 60, 40, 0, 2*math.pi)
        ctx.fill()

        ctx.arc(90, 160, 40, math.pi/4, math.pi)
        ctx.fill()

        ctx.translate(220, 180)

        ctx.scale(1, 0.7)
        ctx.arc(0, 0, 50, 0, 2*math.pi)
        ctx.fill()


def on_activate(app):

    win = AppWindow(app)
    win.present()


app = Gtk.Application(application_id='com.zetcode.Drawing')
app.connect('activate', on_activate)
app.run(None)
该示例绘制了一些基本形状。
area = Gtk.DrawingArea.new()
area.set_draw_func(self.on_draw)
我们创建 Gtk.DrawingArea 并使用 set_draw_func 设置绘图函数。
def on_draw(self, da, ctx, w, h):
    ...
on_draw 的第二个参数是绘图区域,第三个参数是绘图上下文。上下文是一个对象,用于在所有可绘制对象上进行绘制。最后两个参数是该区域的宽度和高度。
ctx.set_source_rgb(0.6, 0.6, 0.6)
set_source_rgb 方法为绘图上下文设置颜色。该方法的三个参数是颜色强度值。这些值从 0 到 1。
ctx.rectangle(20, 20, 120, 80)
ctx.rectangle(180, 20, 80, 80)
ctx.fill()
我们绘制两个矩形。fill 方法以先前设置的颜色绘制矩形的内部。
ctx.arc(330, 60, 40, 0, 2*math.pi)
ctx.fill()
使用 arc 方法,我们绘制一个完整的圆。
ctx.translate(220, 180)
translate 方法按 delta x 和 delta y 移动用户空间原点。
ctx.scale(1, 0.7)
ctx.arc(0, 0, 50, 0, 2*math.pi)
ctx.fill()
如果我们想绘制一个椭圆,我们首先进行一些缩放。这里 scale 方法会缩小 y 轴。
Python Gtk.Menu
在下一个示例中,我们创建一个带有菜单栏的应用程序。
#!/usr/bin/python

import gi
gi.require_version('Gtk', '4.0')
from gi.repository import Gtk, Gio


class AppWindow(Gtk.ApplicationWindow):

    def __init__(self, app):

        super(AppWindow, self).__init__(application=app)

        self.init_ui(app)

    def init_ui(self, app):

        self.set_title('Simple menu')

        main = Gio.Menu.new()
        fmi = Gio.MenuItem.new('File')

        menu = Gio.Menu.new()
        emi = Gio.MenuItem.new('Exit', 'app.quit')
        menu.append_item(emi)

        fmi.set_submenu(menu)
        main.append_item(fmi)

        app.set_menubar(main)

        act_quit = Gio.SimpleAction.new('quit', None)
        Gio.ActionMap.add_action(app, act_quit)
        act_quit.connect('activate', self.on_close, app)

        self.set_show_menubar(True)
        self.set_default_size(350, 250)

    def on_close(self, *_):
        self.close()


def on_activate(app):

    win = AppWindow(app)
    win.present()


app = Gtk.Application(application_id='com.zetcode.SimpleMenu')
app.connect('activate', on_activate)
app.run(None)
菜单栏有一个菜单项,它会终止应用程序。
main = Gio.Menu.new()
fmi = Gio.MenuItem.new('File')

menu = Gio.Menu.new()
emi = Gio.MenuItem.new('Exit', 'app.quit')
menu.append_item(emi)

fmi.set_submenu(menu)
main.append_item(fmi)
我们设置菜单和菜单项。app.quit 字符串引用使用应用程序对象注册的操作。
app.set_menubar(main)
我们使用 set_menubar 设置菜单栏。
act_quit = Gio.SimpleAction.new('quit', None)
Gio.ActionMap.add_action(app, act_quit)
act_quit.connect('activate', self.on_close, app)
创建一个简单的操作;该操作调用 on_close,它终止应用程序。
self.set_show_menubar(True)
我们使用 set_show_menubar 显示菜单栏。
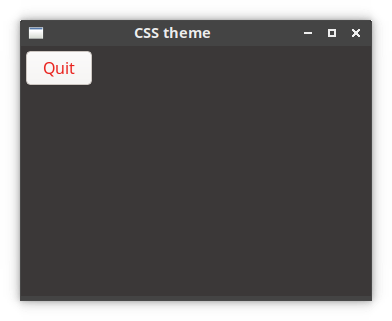
CSS 主题
我们可以使用 CSS 对我们的应用程序进行主题设置。
window {
    background-color: rgb(59, 56, 56);
}

button {
    color: rgb(233, 32, 27);
}
在 CSS 中,我们为窗口设置自定义背景颜色,并为按钮设置自定义前景色。
#!/usr/bin/python

import gi
gi.require_version('Gtk', '4.0')
from gi.repository import Gtk, Gio


class AppWindow(Gtk.ApplicationWindow):

    def __init__(self, app):

        super(AppWindow, self).__init__(application=app)

        self.init_ui()

    def init_ui(self):

        self.set_title('CSS theme')

        box = Gtk.Box.new(Gtk.Orientation.VERTICAL, 0)

        btn = Gtk.Button(label="Quit")
        btn.connect('clicked', lambda _: self.close())

        btn.set_margin_start(5)
        btn.set_margin_top(5)
        btn.set_halign(Gtk.Align.START)

        box.append(btn)

        self.set_child(box)
        self.set_default_size(350, 250)


def on_activate(app):

    win = AppWindow(app)

    display = Gtk.Widget.get_display(win)
    provider = Gtk.CssProvider.new()
    fname = Gio.file_new_for_path('theme.css')
    provider.load_from_file(fname)
    Gtk.StyleContext.add_provider_for_display(display, provider,
        Gtk.STYLE_PROVIDER_PRIORITY_APPLICATION)

    win.present()


app = Gtk.Application(application_id='com.zetcode.CheckButton')
app.connect('activate', on_activate)
app.run(None)
主题是使用 Gtk.CssProvider 创建的。在此示例中,我们从文件中加载 CSS。
display = Gtk.Widget.get_display(win)
provider = Gtk.CssProvider.new()
fname = Gio.file_new_for_path('theme.css')
provider.load_from_file(fname)
Gtk.StyleContext.add_provider_for_display(display, provider,
    Gtk.STYLE_PROVIDER_PRIORITY_APPLICATION)
我们创建一个 CSS 提供程序,加载主题,并将提供程序应用于显示。
来源
在本文中,我们使用 Python Gtk 创建了基本的 GUI 应用程序。
作者
列出所有 Python 教程。