PyQt QLabel
最后修改于 2023 年 8 月 24 日
在本文中,我们将展示如何使用 QLabel 部件。
访问 ,阅读 PyQt6 教程,或列出所有 PyQt 教程。
QLabel
QLabel 是一个显示文本或图像的部件。它不提供用户交互功能。默认情况下,标签显示左对齐、垂直居中的文本和图像。
QLabel 文本标签
以下示例在窗口上显示了文本标签。
text_labels.py
#!/usr/bin/python

import sys
from PyQt6.QtWidgets import QWidget, QLabel, QApplication, QHBoxLayout

class Example(QWidget):

    def __init__(self):
        super().__init__()

        self.initUI()


    def initUI(self):

        hbox = QHBoxLayout()

        hbox.addWidget(QLabel("falcon"))
        hbox.addWidget(QLabel("owl"))
        hbox.addWidget(QLabel("eagle"))
        hbox.addWidget(QLabel("skylark"))

        self.setLayout(hbox)

        self.setGeometry(300, 300, 350, 250)
        self.setWindowTitle('QLabel')
        self.show()


def main():

    app = QApplication(sys.argv)
    ex = Example()
    sys.exit(app.exec())


if __name__ == '__main__':
    main()
在此示例中,我们将四个标签放置在一个水平框中。
QLabel 图像
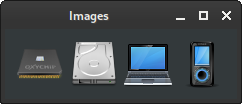
以下示例使用 QLabel 来显示图像。要在标签上显示图像,我们还需要使用 QPixmap。
images.py
#!/usr/bin/python


import sys
from PyQt6.QtWidgets import QWidget, QLabel, QApplication, QHBoxLayout
from PyQt6.QtGui import QPixmap


class Example(QWidget):

    def __init__(self):
        super().__init__()

        self.initUI()


    def initUI(self):

        hbox = QHBoxLayout()

        lbl1 = QLabel()
        lbl1.setPixmap(QPixmap("cpu.png"))

        lbl2 = QLabel()
        lbl2.setPixmap(QPixmap("drive.png"))

        lbl3 = QLabel()
        lbl3.setPixmap(QPixmap("laptop.png"))

        lbl4 = QLabel()
        lbl4.setPixmap(QPixmap("player.png"))

        hbox.addWidget(lbl1)
        hbox.addWidget(lbl2)
        hbox.addWidget(lbl3)
        hbox.addWidget(lbl4)

        self.setLayout(hbox)

        self.move(400, 300)
        self.setWindowTitle('Images')
        self.show()


def main():

    app = QApplication(sys.argv)
    ex = Example()
    sys.exit(app.exec())


if __name__ == '__main__':
    main()
窗口上显示了四张 PNG 图像。通过 setPixmap 函数将图像设置到标签上。
QLabel 颜色
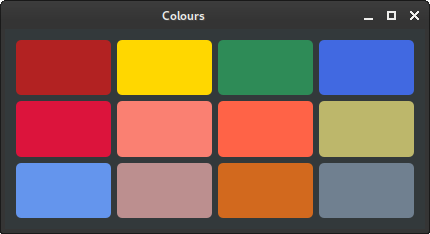
在下面的示例中,我们使用标签来显示各种颜色。
colours.py
#!/usr/bin/python

import sys
from PyQt6.QtWidgets import QWidget, QLabel, QApplication, QGridLayout


class Example(QWidget):

    def __init__(self):
        super().__init__()

        self.initUI()


    def initUI(self):

        grid = QGridLayout()

        lbl1 = QLabel()
        lbl1.setStyleSheet("background-color:firebrick; border-radius:5px")

        lbl2 = QLabel()
        lbl2.setStyleSheet("background-color:gold; border-radius:5px")

        lbl3 = QLabel()
        lbl3.setStyleSheet("background-color:seagreen; border-radius:5px")

        lbl4 = QLabel()
        lbl4.setStyleSheet("background-color:royalblue; border-radius:5px")

        lbl5 = QLabel()
        lbl5.setStyleSheet("background-color:crimson; border-radius:5px")

        lbl6 = QLabel()
        lbl6.setStyleSheet("background-color:salmon; border-radius:5px")

        lbl7 = QLabel()
        lbl7.setStyleSheet("background-color:deeppink; border-radius:5px")

        lbl8 = QLabel()
        lbl8.setStyleSheet("background-color:tomato; border-radius:5px")

        lbl9 = QLabel()
        lbl9.setStyleSheet("background-color:darkkhaki; border-radius:5px")

        lbl10 = QLabel()
        lbl10.setStyleSheet("background-color:cornflowerblue; border-radius:5px")

        lbl11 = QLabel()
        lbl11.setStyleSheet("background-color:rosybrown; border-radius:5px")

        lbl12 = QLabel()
        lbl12.setStyleSheet("background-color:chocolate; border-radius:5px")

        lbl13 = QLabel()
        lbl13.setStyleSheet("background-color:slategray; border-radius:5px")

        grid.addWidget(lbl1, 0, 0)
        grid.addWidget(lbl2, 0, 1)
        grid.addWidget(lbl3, 0, 2)
        grid.addWidget(lbl4, 0, 3)
        grid.addWidget(lbl5, 1, 0)
        grid.addWidget(lbl6, 1, 1)
        grid.addWidget(lbl8, 1, 2)
        grid.addWidget(lbl9, 1, 3)
        grid.addWidget(lbl10, 2, 0)
        grid.addWidget(lbl11, 2, 1)
        grid.addWidget(lbl12, 2, 2)
        grid.addWidget(lbl13, 2, 3)

        self.setLayout(grid)

        self.setGeometry(300, 300, 420, 200)
        self.setWindowTitle('Colours')
        self.show()


def main():

    app = QApplication(sys.argv)
    ex = Example()
    sys.exit(app.exec())


if __name__ == '__main__':
    main()
在此示例中,我们显示了十二个彩色的圆角矩形。
lbl1 = QLabel()
lbl1.setStyleSheet("background-color:firebrick; border-radius:5px")
颜色通过 setStyleSheet 函数设置。我们还更改了边框的圆角半径。
QLabel 超链接
QLabel 可用于创建超链接。
hyperlink.py
#!/usr/bin/python

import sys
from PyQt6.QtWidgets import QWidget, QLabel, QApplication, QHBoxLayout


class Example(QWidget):

    def __init__(self):
        super().__init__()

        self.initUI()

    def initUI(self):

        hbox = QHBoxLayout()

        link = QLabel('<a href="https://zetcode.cn">zetcode.com</a>')
        link.setOpenExternalLinks(True)

        hbox.addWidget(link)

        self.setLayout(hbox)

        self.setGeometry(300, 300, 350, 250)
        self.setWindowTitle('HTML link')
        self.show()


def main():

    app = QApplication(sys.argv)
    ex = Example()
    sys.exit(app.exec())


if __name__ == '__main__':
    main()
在此示例中,我们向标签传递了一个 HTML 锚点。setOpenExternalLinks 函数会在点击时自动打开提供的链接。
在本文中,我们介绍了 PyQt 的 QLabel 部件。
作者
列出所有 PyQt 教程。