Android 中的布局管理
最后修改于 2012 年 12 月 3 日
在本章 Android 开发教程中,我们将讨论布局管理。控件。
当我们设计应用程序的用户界面时,我们会决定使用哪些组件以及如何在应用程序中组织这些组件。为了组织我们的组件,我们使用称为布局管理器的特殊非可见对象。
Android 中有几种布局管理器。LinearLayout 将其视图排列成一行或一列。FrameLayout 是一个用于显示单个视图的简单布局管理器。RelativeLayout 是一个布局管理器,其中视图相对于彼此或父级定位。最强大的布局管理器是 GridLayout管理器。它将视图排列成网格。
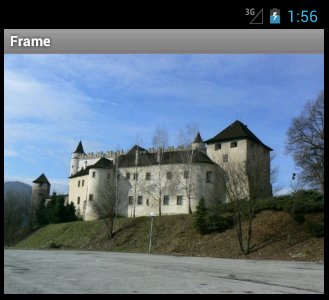
使用 FrameLayout 显示图像
第一个示例使用 FrameLayout管理器显示图像。
$ ls res/drawable-hdpi/
ic_launcher.png  zamok.jpg
根据我们使用的 Android 虚拟设备,我们将图像放在 res 目录的相应子目录中。
<?xml version="1.0" encoding="utf-8"?>
<FrameLayout xmlns:android="http://schemas.android.com/apk/res/android"
    android:layout_gravity="top"
    android:layout_width="wrap_content"
    android:layout_height="wrap_content"
    >

 <ImageView
        android:layout_height="match_parent"
        android:layout_width="match_parent"
        android:src="@drawable/zamok"  />

</FrameLayout>
在 FrameLayout管理器中,我们放置了一个 ImageView。
<FrameLayout xmlns:android="http://schemas.android.com/apk/res/android"
    android:layout_gravity="top"
    android:layout_width="wrap_content"
    android:layout_height="wrap_content"
    >
通过将布局的宽度和高度设置为 wrap_content,FrameLayout足够大以显示 ImageView。它通过 layout_gravity 属性推到顶部。
<ImageView
    android:layout_height="match_parent"
    android:layout_width="match_parent"
    android:src="@drawable/zamok"  />
ImageView 显示图像。图像位于 res 目录的子目录中。
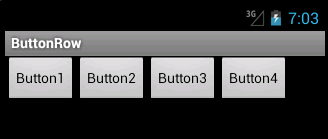
一排按钮
在示例中,我们创建了一排四个按钮。
<?xml version="1.0" encoding="utf-8"?>
<LinearLayout xmlns:android="http://schemas.android.com/apk/res/android"
    android:orientation="horizontal"
    android:layout_width="match_parent"
    android:layout_height="match_parent"
    >

  <Button
      android:layout_height="wrap_content"
      android:layout_width="wrap_content"
      android:text="Button1" />

  <Button
      android:layout_height="wrap_content"
      android:layout_width="wrap_content"
      android:text="Button2" />

  <Button
      android:layout_height="wrap_content"
      android:layout_width="wrap_content"
      android:text="Button3" />

  <Button
      android:layout_height="wrap_content"
      android:layout_width="wrap_content"
      android:text="Button4" />

</LinearLayout>
我们有一个水平的 LinearLayout。在此布局中,我们添加了四个按钮。
<LinearLayout xmlns:android="http://schemas.android.com/apk/res/android"
    android:orientation="horizontal"
    android:layout_width="match_parent"
    android:layout_height="match_parent"
    >
我们创建了一个水平的 LinearLayout管理器。布局的宽度和高度与父级匹配,这意味着它会填充整个屏幕。
<Button
    android:layout_height="wrap_content"
    android:layout_width="wrap_content"
    android:text="Button1" />
四个按钮中的每一个都使用 wrap_content 属性。然后它们的大小刚好足以显示其内容。
一排按钮 II
在本章的第三个示例中,我们将展示如何使用 LinearLayout管理器以编程方式创建一排按钮。
package com.zetcode.btnrow2;

import android.app.Activity;
import android.os.Bundle;
import android.widget.Button;
import android.widget.LinearLayout;

public class ButtonRow2 extends Activity
{
    @Override
    public void onCreate(Bundle savedInstanceState)
    {
        super.onCreate(savedInstanceState);

        initUI();
    }

    public void initUI()
    {
        Button btn1 = new Button(this);
        btn1.setText("Button");

        Button btn2 = new Button(this);
        btn2.setText("Button");

        Button btn3 = new Button(this);
        btn3.setText("Button");

        Button btn4 = new Button(this);
        btn4.setText("Button");

        LinearLayout ll = new LinearLayout(this);
        ll.setOrientation(LinearLayout.HORIZONTAL);

        ll.addView(btn1);
        ll.addView(btn2);
        ll.addView(btn3);
        ll.addView(btn4);

        setContentView(ll);
    }
}
四个按钮放置在一个水平的 LinearLayout中。在此示例中,我们不使用布局 XML 文件。
Button btn1 = new Button(this);
btn1.setText("Button");
创建了一个 Button控件。使用 setText()方法为按钮设置文本。
LinearLayout ll = new LinearLayout(this);
ll.setOrientation(LinearLayout.HORIZONTAL);
创建了一个水平的 LinearLayout。
ll.addView(btn1);
ll.addView(btn2);
ll.addView(btn3);
ll.addView(btn4);
将按钮添加到布局管理器。
setContentView(ll);
线性布局管理器被设置为活动的 content view。
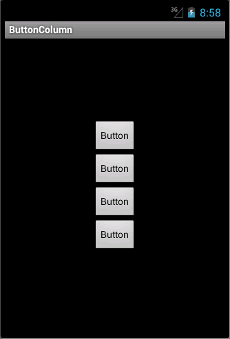
一列按钮
我们使用 FrameLayout和 LinearLayout管理器在屏幕中央创建一列按钮。
<?xml version="1.0" encoding="utf-8"?>
<FrameLayout
    xmlns:android="http://schemas.android.com/apk/res/android"
    android:layout_width="wrap_content"
    android:layout_height="wrap_content"
    android:layout_gravity="center"
    >

  <LinearLayout xmlns:android="http://schemas.android.com/apk/res/android"
      android:orientation="vertical"
      android:layout_width="match_parent"
      android:layout_height="match_parent"
      >

      <Button
        android:layout_height="wrap_content"
        android:layout_width="wrap_content"
        android:text="Button" />

      <Button
        android:layout_height="wrap_content"
        android:layout_width="wrap_content"
        android:text="Button" />

      <Button
        android:layout_height="wrap_content"
        android:layout_width="wrap_content"
        android:text="Button" />

      <Button
        android:layout_height="wrap_content"
        android:layout_width="wrap_content"
        android:text="Button" />

  </LinearLayout>

</FrameLayout>
一个带有四个按钮的 LinearLayout管理器被放置在 FrameLayout管理器中。
<FrameLayout
    xmlns:android="http://schemas.android.com/apk/res/android"
    android:layout_width="wrap_content"
    android:layout_height="wrap_content"
    android:layout_gravity="center"
    >
FrameLayout 不占用所有可用空间。它的大小刚好足以容纳所有四个按钮。因此,我们可以使用 layout_gravity 属性来居中 LinearLayout及其四个按钮。
<LinearLayout xmlns:android="http://schemas.android.com/apk/res/android"
    android:orientation="vertical"
    android:layout_width="match_parent"
    android:layout_height="match_parent"
    >
创建了一个垂直的 LinearLayout。
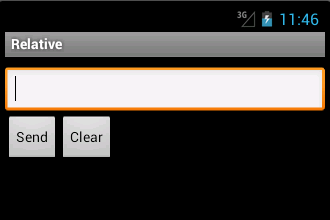
RelativeLayout
RelativeLayout 允许子视图指定相对于父视图或彼此的位置。视图通过其 ID 引用。
<?xml version="1.0" encoding="utf-8"?>
<RelativeLayout xmlns:android="http://schemas.android.com/apk/res/android"
    android:layout_width="fill_parent"
    android:layout_height="fill_parent"
    >

    <EditText
      android:id="@+id/etId"
      android:layout_marginTop="10dp"
      android:layout_width="match_parent"
      android:layout_height="wrap_content" />

    <Button
      android:id="@+id/btn_sendId"
      android:layout_below="@+id/etId"
      android:layout_width="wrap_content"
      android:layout_height="wrap_content"
      android:text="Send" />

    <Button
      android:id="@+id/btn_clearId"
      android:layout_below="@+id/etId"
      android:layout_toRightOf="@+id/btn_sendId"
      android:layout_width="wrap_content"
      android:layout_height="wrap_content"
      android:text="Clear" />

</RelativeLayout>
XML 代码显示了一个 EditText和两个按钮。
<EditText
    android:id="@+id/etId"
    android:layout_marginTop="10dp"
    android:layout_width="match_parent"
    android:layout_height="wrap_content" />
通过将 android:layout_width设置为 android:match_parent,EditText将从右向左拉伸。该控件的高度足以显示其内容。我们使用 android:layout_marginTop属性在控件和屏幕边框之间指定一些间距。
<Button
    android:id="@+id/btn_sendId"
    android:layout_below="@+id/etId"
    android:layout_width="wrap_content"
    android:layout_height="wrap_content"
    android:text="Send" />
“发送”按钮控件将放置在 EditText控件下方。为了实现这一点,我们使用 android:layout_below属性。请注意,我们引用了与之相关的控件的 ID。
<Button
    android:id="@+id/btn_clearId"
    android:layout_below="@+id/etId"
    android:layout_toRightOf="@+id/btn_sendId"
    android:layout_width="wrap_content"
    android:layout_height="wrap_content"
    android:text="Clear" />
“清除”按钮放置在 EditText控件下方,并位于“发送”按钮的右侧。我们通过两个属性来实现这一点。android:layout_below 和 android:layout_toRightOf 属性。
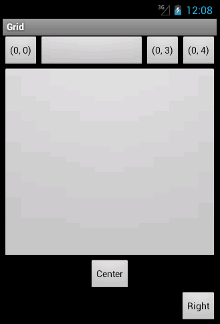
Grid
GridLayout管理器将其子项放置在矩形网格中。网格由行和列组成。行和列的交叉点是单元格。每个单元格都通过其索引进行引用。网格中的视图可以占用一个或多个单元格。gravity 是一个指定视图如何在单元格组中定位的属性。
<?xml version="1.0" encoding="utf-8"?>
<GridLayout xmlns:android="http://schemas.android.com/apk/res/android"
    android:layout_width="match_parent"
    android:layout_height="match_parent"
    >

    <Button
      android:text="(0, 0)"
      android:layout_row="0"
      android:layout_column="0" />

    <Button
      android:layout_row="0"
      android:layout_column="1"
      android:layout_columnSpan="2"
      android:layout_gravity="fill_horizontal" />

    <Button
      android:text="(0, 3)"
      android:layout_row="0"
      android:layout_column="3" />

    <Button
      android:text="(0, 4)"
      android:layout_row="0"
      android:layout_column="4" />

    <Button
      android:layout_row="1"
      android:layout_column="0"
      android:layout_rowSpan="3"
      android:layout_columnSpan="5"
      android:layout_gravity="fill" />

    <Button
      android:text="Center"
      android:layout_row="4"
      android:layout_column="0"
      android:layout_columnSpan="5"
      android:layout_gravity="center_horizontal" />

    <Button
      android:text="Right"
      android:layout_row="5"
      android:layout_column="0"
      android:layout_columnSpan="5"
      android:layout_gravity="right" />

</GridLayout>
在示例中,我们将一些按钮放入 GridLayout中。我们展示了按钮如何跨越多个单元格。
<Button
    android:text="(0, 0)"
    android:layout_row="0"
    android:layout_column="0" />
使用 layout_row 和 layout_column 属性,我们将一个按钮放置在左上角单元格。索引从零开始。
<Button
    android:layout_row="0"
    android:layout_column="1"
    android:layout_columnSpan="2"
    android:layout_gravity="fill_horizontal" />
此按钮将跨越两列。layout_gravity 属性将导致按钮填充两列。
<Button
    android:layout_row="1"
    android:layout_column="0"
    android:layout_rowSpan="3"
    android:layout_columnSpan="5"
    android:layout_gravity="fill" />
此按钮将跨越三行五列。
<Button
    android:text="Center"
    android:layout_row="4"
    android:layout_column="0"
    android:layout_columnSpan="5"
    android:layout_gravity="center_horizontal" />
一个视图可能不会占用分配给它的所有空间。此按钮在五列之间水平居中。
在本章 Android 开发教程中,我们学习了布局管理。