wxWidgets 中的第一个程序
最后修改于 2023 年 10 月 18 日
在本章中,我们将介绍创建 wxWidgets 应用程序所需的基础知识。 我们创建了第一个简单的示例,展示了如何显示图标。 接下来,我们创建一个简单的示例,演示事件的使用。 最后,我们将了解在 wxWidgets 应用程序中小部件如何通信。
一个简单的应用程序
首先,我们创建最基本的 wxWidgets 程序。
#include <wx/wx.h>

class Simple : public wxFrame
{
public:
    Simple(const wxString& title);

};
#include "simple.h"

Simple::Simple(const wxString& title)
       : wxFrame(NULL, wxID_ANY, title, wxDefaultPosition, wxSize(250, 150))
{
  Centre();
}
#include <wx/wx.h>

class MyApp : public wxApp
{
  public:
    virtual bool OnInit();
};
#include "main.h"
#include "simple.h"

IMPLEMENT_APP(MyApp)

bool MyApp::OnInit()
{
    Simple *simple = new Simple(wxT("Simple"));
    simple->Show(true);

    return true;
}
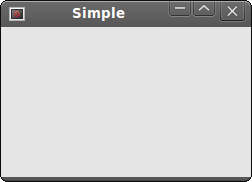
这个非常基本的例子在屏幕上显示一个小窗口。 窗口居中显示。
Centre();
此方法将窗口在屏幕上水平和垂直居中。
IMPLEMENT_APP(MyApp)
实现应用程序的代码隐藏在此宏的后面。 这是复制粘贴代码,我们通常不必关心它。
g++ main.cpp main.h simple.cpp simple.h `wx-config --cxxflags --libs` -o simple
要在 Unix 上编译该示例,请运行以上命令。
应用程序图标
在此示例中,我们为应用程序提供了一个图标。 在窗口的左上角显示一个小图标已成为标准做法。 该图标是程序的图形标识。
#include <wx/wx.h>

class Icon : public wxFrame
{
public:
    Icon(const wxString& title);

};
#include "icon.h"

Icon::Icon(const wxString& title)
       : wxFrame(NULL, wxID_ANY, title, wxDefaultPosition, wxSize(250, 150))
{
  SetIcon(wxIcon(wxT("web.xpm")));
  Centre();
}
#include <wx/wx.h>

class MyApp : public wxApp
{
  public:
    virtual bool OnInit();
};
#include "main.h"
#include "icon.h"

IMPLEMENT_APP(MyApp)

bool MyApp::OnInit()
{
    Icon *icon = new Icon(wxT("Icon"));
    icon->Show(true);

    return true;
}
在我们的示例中,我们显示一个小网络图标。
SetIcon(wxIcon(wxT("web.xpm")));
显示应用程序图标只需一行代码。 XPM (X PixMap) 是一种 ASCII 图像格式。
一个简单的按钮
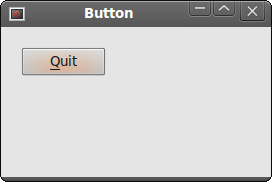
在下面的示例中,我们在框架小部件上创建一个按钮。 我们展示了如何创建一个简单的事件处理程序。
#include <wx/wx.h>

class Button : public wxFrame
{
public:
    Button(const wxString& title);

    void OnQuit(wxCommandEvent & event);
};
#include "button.h"

Button::Button(const wxString& title)
       : wxFrame(NULL, wxID_ANY, title, wxDefaultPosition, wxSize(270, 150))
{
  wxPanel *panel = new wxPanel(this, wxID_ANY);

  wxButton *button = new wxButton(panel, wxID_EXIT, wxT("Quit"),
      wxPoint(20, 20));
  Connect(wxID_EXIT, wxEVT_COMMAND_BUTTON_CLICKED,
      wxCommandEventHandler(Button::OnQuit));
  button->SetFocus();
  Centre();
}

void Button::OnQuit(wxCommandEvent & WXUNUSED(event))
{
    Close(true);
}
#include <wx/wx.h>

class MyApp : public wxApp
{
  public:
    virtual bool OnInit();
};
#include "main.h"
#include "button.h"

IMPLEMENT_APP(MyApp)

bool MyApp::OnInit()
{

    Button *btnapp = new Button(wxT("Button"));
    btnapp->Show(true);

    return true;
}
wxPanel *panel = new wxPanel(this, wxID_ANY);
首先,我们创建一个 wxPanel 小部件。 它将被放置在 wxFrame 小部件内。
wxButton *button = new wxButton(panel, wxID_EXIT, wxT("Quit"), wxPoint(20, 20));
我们创建一个 wxButton 小部件。 它被放置在面板上。 我们使用预定义的 wxID_EXIT id 作为按钮。 它将导致在按钮上显示一个小退出图标。 按钮的标签是“退出”。 按钮手动放置在 x=20, y=20 坐标处。 坐标系的起点位于左上角。
Connect(wxID_EXIT, wxEVT_COMMAND_BUTTON_CLICKED,
    wxCommandEventHandler(Button::OnQuit));
如果我们单击按钮,则会生成 wxEVT_COMMAND_BUTTON_CLICKED 事件。 我们将该事件连接到 Button 类的 OnQuit 方法。 因此,当我们单击按钮时,会调用 OnQuit 方法。
button->SetFocus();
我们将键盘焦点设置为按钮。 因此,如果我们按下 Enter 键,则会单击该按钮。
Close(true);
在 OnQuit 方法中,我们调用 Close 方法。 这将终止我们的应用程序。
小部件通信
了解小部件如何在应用程序中通信非常重要。 按照下一个例子。
#include <wx/wx.h>
#include <wx/panel.h>

class LeftPanel : public wxPanel
{
public:
    LeftPanel(wxPanel *parent);

    void OnPlus(wxCommandEvent & event);
    void OnMinus(wxCommandEvent & event);

    wxButton *m_plus;
    wxButton *m_minus;
    wxPanel *m_parent;
    int count;

};

class RightPanel : public wxPanel
{
public:
    RightPanel(wxPanel *parent);

    void OnSetText(wxCommandEvent & event);

    wxStaticText *m_text;

};

const int ID_PLUS = 101;
const int ID_MINUS = 102;
#include <wx/stattext.h>
#include "Communicate.h"

LeftPanel::LeftPanel(wxPanel * parent)
       : wxPanel(parent, -1, wxPoint(-1, -1), wxSize(-1, -1), wxBORDER_SUNKEN)
{
  count = 0;
  m_parent = parent;
  m_plus = new wxButton(this, ID_PLUS, wxT("+"),
      wxPoint(10, 10));
  m_minus = new wxButton(this, ID_MINUS, wxT("-"),
      wxPoint(10, 60));
  Connect(ID_PLUS, wxEVT_COMMAND_BUTTON_CLICKED,
      wxCommandEventHandler(LeftPanel::OnPlus));
  Connect(ID_MINUS, wxEVT_COMMAND_BUTTON_CLICKED,
      wxCommandEventHandler(LeftPanel::OnMinus));
}

void LeftPanel::OnPlus(wxCommandEvent & WXUNUSED(event))
{
  count++;

  Communicate *comm = (Communicate *) m_parent->GetParent();
  comm->m_rp->m_text->SetLabel(wxString::Format(wxT("%d"), count));
}

void LeftPanel::OnMinus(wxCommandEvent & WXUNUSED(event))
{
  count--;

  Communicate *comm = (Communicate *) m_parent->GetParent();
  comm->m_rp->m_text->SetLabel(wxString::Format(wxT("%d"), count));
}


RightPanel::RightPanel(wxPanel * parent)
       : wxPanel(parent, wxID_ANY, wxDefaultPosition,
         wxSize(270, 150), wxBORDER_SUNKEN)
{
    m_text = new wxStaticText(this, -1, wxT("0"), wxPoint(40, 60));
}
#include "Panels.h"
#include <wx/wxprec.h>


class Communicate : public wxFrame
{
public:
    Communicate(const wxString& title);


    LeftPanel *m_lp;
    RightPanel *m_rp;
    wxPanel *m_parent;

};
#include "Communicate.h"

Communicate::Communicate(const wxString& title)
       : wxFrame(NULL, wxID_ANY, title, wxDefaultPosition, wxSize(290, 150))
{
  m_parent = new wxPanel(this, wxID_ANY);

  wxBoxSizer *hbox = new wxBoxSizer(wxHORIZONTAL);

  m_lp = new LeftPanel(m_parent);
  m_rp = new RightPanel(m_parent);

  hbox->Add(m_lp, 1, wxEXPAND | wxALL, 5);
  hbox->Add(m_rp, 1, wxEXPAND | wxALL, 5);

  m_parent->SetSizer(hbox);

  this->Centre();
}
#include <wx/wx.h>

class MyApp : public wxApp
{
  public:
    virtual bool OnInit();
};
#include "main.h"
#include "Communicate.h"

IMPLEMENT_APP(MyApp)

bool MyApp::OnInit()
{

    Communicate *communicate = new Communicate(wxT("Widgets communicate"));
    communicate->Show(true);

    return true;
}
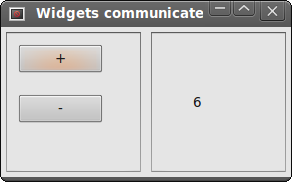
在我们的示例中,我们有两个面板。 一个左侧面板和一个右侧面板。 左侧面板有两个按钮。 右侧面板有一个静态文本。 按钮更改静态文本中显示的数字。 问题是,我们如何获取指向静态文本的指针?
m_parent = parent;
在这里,我们保存指向 LeftPanel 的父小部件的指针。 它是一个 wxPanel 小部件。
Communicate *comm = (Communicate *) m_parent->GetParent();
comm->m_rp->m_text->SetLabel(wxString::Format(wxT("%d"), count));
这两行是该示例中最重要的行。 它显示了我们如何访问放置在不同面板上的静态文本小部件。 首先,我们获取左右两个面板的父级。 这个父小部件有一个指向右侧面板的指针。 而右侧面板有一个指向静态文本的指针。
在本部分的 wxWidgets 教程中,我们创建了一些简单的程序。