Tkinter 中的长时间运行任务
最后修改于 2020 年 7 月 13 日
Tkinter 使用单线程事件模型。主事件循环和所有事件处理程序都在一个线程中执行。因此,事件处理程序必须非常快速,否则用户会认为应用程序没有响应。长时间运行的任务必须在主事件线程之外执行。
在我们的程序中,我们计算 Pi 数字;数字越长,计算所需的时间越多。
多进程
我们使用 Python 的 `multiprocessing` 模块在单独的进程中执行耗时任务。该包支持使用与 `threading` 模块类似的 API 来创建进程。`multiprocessing` 模块在 Windows 和 Linux 上的工作方式不同。在 Linux 上,利用 `fork` 系统调用,而在 Windows 上,使用 `pickle` 模块。这有一些重要的后果。我们将代码示例分为 Linux 和 Windows 程序。
我们的程序有一个限制。它使用 `Queue` 对象在进程之间交换值。此队列对其可以接收的值的大小有限制。大小由操作系统管道确定。超过此限制后,程序将陷入死锁。在 Windows 7 上计算出的最大 Pi 数字为 8156 位。在 Linux 上,我们设法计算了超过 60,000 位的 Pi。
在 Linux 上计算 Pi
以下程序在 Linux 上计算 Pi。
#!/usr/bin/env python3
# -*- coding: utf-8 -*-

"""
ZetCode Tkinter e-book

This script produces a long-running task of calculating
a large Pi number, while keeping the GUI responsive.

Author: Jan Bodnar
Last modified: January 2016
Website: www.zetcode.com
"""

from tkinter import (Tk, BOTH, Text, E, W, S, N, END,
    NORMAL, DISABLED, StringVar)
from tkinter.ttk import Frame, Label, Button, Progressbar, Entry
from tkinter import scrolledtext

from multiprocessing import Queue, Process
import queue
from decimal import Decimal, getcontext

DELAY1 = 80
DELAY2 = 20

class Example(Frame):

    def __init__(self, parent, q):
        Frame.__init__(self, parent)

        self.queue = q
        self.parent = parent
        self.initUI()


    def initUI(self):

        self.parent.title("Pi computation")
        self.pack(fill=BOTH, expand=True)

        self.grid_columnconfigure(4, weight=1)
        self.grid_rowconfigure(3, weight=1)

        lbl1 = Label(self, text="Digits:")
        lbl1.grid(row=0, column=0, sticky=E, padx=10, pady=10)

        self.ent1 = Entry(self, width=10)
        self.ent1.insert(END, "4000")
        self.ent1.grid(row=0, column=1, sticky=W)

        lbl2 = Label(self, text="Accuracy:")
        lbl2.grid(row=0, column=2, sticky=E, padx=10, pady=10)

        self.ent2 = Entry(self, width=10)
        self.ent2.insert(END, "100")
        self.ent2.grid(row=0, column=3, sticky=W)

        self.startBtn = Button(self, text="Start",
            command=self.onStart)
        self.startBtn.grid(row=1, column=0, padx=10, pady=5, sticky=W)

        self.pbar = Progressbar(self, mode='indeterminate')
        self.pbar.grid(row=1, column=1, columnspan=3, sticky=W+E)

        self.txt = scrolledtext.ScrolledText(self)
        self.txt.grid(row=2, column=0, rowspan=4, padx=10, pady=5,
            columnspan=5, sticky=E+W+S+N)


    def onStart(self):

        self.startBtn.config(state=DISABLED)
        self.txt.delete("1.0", END)

        self.digits = int(self.ent1.get())
        self.accuracy = int(self.ent2.get())

        self.p1 = Process(target=self.generatePi, args=(self.queue,))
        self.p1.start()
        self.pbar.start(DELAY2)
        self.after(DELAY1, self.onGetValue)


    def onGetValue(self):

        if (self.p1.is_alive()):

            self.after(DELAY1, self.onGetValue)
            return
        else:

            try:
                self.txt.insert('end', self.queue.get(0))
                self.txt.insert('end', "\n")
                self.pbar.stop()
                self.startBtn.config(state=NORMAL)

            except queue.Empty:
                print("queue is empty")


    def generatePi(self, queue):

        getcontext().prec = self.digits

        pi = Decimal(0)
        k = 0
        n = self.accuracy

        while k < n:
            pi += (Decimal(1)/(16**k))*((Decimal(4)/(8*k+1)) - \
                (Decimal(2)/(8*k+4)) - (Decimal(1)/(8*k+5))- \
                (Decimal(1)/(8*k+6)))
            k += 1
            print (self.p1.is_alive())

        queue.put(pi)
        print("end")


def main():

    q = Queue()

    root = Tk()
    root.geometry("400x350+300+300")
    app = Example(root, q)
    root.mainloop()


if __name__ == '__main__':
    main()
该程序计算 Pi 数字。计算需要很长时间才能完成。为了保持响应,计算被放在一个单独的进程中。
self.pbar = Progressbar(self, mode='indeterminate')
self.pbar.grid(row=1, column=1, columnspan=3, sticky=W+E)
我们有一个 `Progressbar` 小部件,在计算过程中会显示进度。这样我们就可以告诉用户应用程序仍在运行。
def onStart(self):

    self.startBtn.config(state=DISABLED)
    self.txt.delete("1.0", END)
...
在计算开始时,我们禁用“开始”按钮并清除文本小部件的内容。
self.digits = int(self.ent1.get())
self.accuracy = int(self.ent2.get())
在计算 Pi 数字中有两个重要的数字。`digits` 值决定了数字的长度。`accuracy` 数字控制给定公式的精度。
self.p1 = Process(target=self.generatePi, args=(self.queue,))
self.p1.start()
启动了一个新的 `Process`。目标是 `generatePi` 方法,该方法计算耗时任务。其他参数是队列,它是一个用于在进程之间通信的对象。
self.after(DELAY1, self.onGetValue)
我们启动了一个计时器。计时器会定期检查任务是否已完成。
def onGetValue(self):

    if (self.p1.is_alive()):

        self.after(DELAY1, self.onGetValue)
        return
使用 `is_alive` 方法,我们检查任务是否仍在运行。
else:

    try:
        self.txt.insert('end', self.queue.get(0))
        self.txt.insert('end', "\n")
        self.pbar.stop()
        self.startBtn.config(state=NORMAL)

    except queue.Empty:
        print("queue is empty")
任务完成后,我们从队列中获取计算出的数字,将其插入文本小部件,然后停止进度条。此外,按钮也会被启用。
def generatePi(self, queue):

    getcontext().prec = self.digits

    pi = Decimal(0)
    k = 0
    n = self.accuracy

    while k < n:
        pi += (Decimal(1)/(16**k))*((Decimal(4)/(8*k+1)) - \
            (Decimal(2)/(8*k+4)) - (Decimal(1)/(8*k+5))- \
            (Decimal(1)/(8*k+6)))
        k += 1

    queue.put(pi)
    print("end")
`generatePi` 方法包含计算 Pi 数字的公式。有几种可用的公式;我们使用了 Bailey–Borwein–Plouffe 公式。计算结束时,数字会被放入队列。重要的是我们不要从该方法中触碰主 GUI 线程中的任何内容。注意 `Decimal` 的使用;Python 的浮点数据类型对于我们的计算来说不够精确。

该图像显示了一个计算出的 Pi,具有 63000 位数字。
在 Windows 上计算 Pi
以下程序在 Windows 上计算 Pi。由于在 Windows 上 `multiprocessing` 使用 `pickle` 模块,因此它继承了其限制。`generatePi` 必须是顶层模块函数,队列也必须是全局对象。
#!/usr/bin/env python3
# -*- coding: utf-8 -*-

"""
ZetCode Tkinter e-book

This script produces a long-running task of calculating
a large Pi number, while keeping the GUI responsive.
This is an example written for Windows.

Author: Jan Bodnar
Last modified: January 2016
Website: www.zetcode.com
"""

from tkinter import (Tk, BOTH, Text, E, W, S, N, END,
    NORMAL, DISABLED, StringVar)
from tkinter.ttk import Frame, Label, Button, Progressbar, Entry
from tkinter import scrolledtext

from multiprocessing import Process, Manager, Queue
from queue import Empty
from decimal import Decimal, getcontext


DELAY1 = 80
DELAY2 = 20

# Queue must be global
q = Queue()

class Example(Frame):

    def __init__(self, parent):
        Frame.__init__(self, parent, name="frame")

        self.parent = parent
        self.initUI()


    def initUI(self):

        self.parent.title("Pi computation")
        self.pack(fill=BOTH, expand=True)

        self.grid_columnconfigure(4, weight=1)
        self.grid_rowconfigure(3, weight=1)

        lbl1 = Label(self, text="Digits:")
        lbl1.grid(row=0, column=0, sticky=E, padx=10, pady=10)

        self.ent1 = Entry(self, width=10)
        self.ent1.insert(END, "4000")
        self.ent1.grid(row=0, column=1, sticky=W)

        lbl2 = Label(self, text="Accuracy:")
        lbl2.grid(row=0, column=2, sticky=E, padx=10, pady=10)

        self.ent2 = Entry(self, width=10)
        self.ent2.insert(END, "100")
        self.ent2.grid(row=0, column=3, sticky=W)

        self.startBtn = Button(self, text="Start",
            command=self.onStart)
        self.startBtn.grid(row=1, column=0, padx=10, pady=5, sticky=W)

        self.pbar = Progressbar(self, mode='indeterminate')
        self.pbar.grid(row=1, column=1, columnspan=3, sticky=W+E)

        self.txt = scrolledtext.ScrolledText(self)
        self.txt.grid(row=2, column=0, rowspan=4, padx=10, pady=5,
            columnspan=5, sticky=E+W+S+N)


    def onStart(self):

        self.startBtn.config(state=DISABLED)
        self.txt.delete("1.0", END)

        digits = int(self.ent1.get())
        accuracy = int(self.ent2.get())

        self.p1 = Process(target=generatePi, args=(q, digits, accuracy))
        self.p1.start()
        self.pbar.start(DELAY2)
        self.after(DELAY1, self.onGetValue)


    def onGetValue(self):

        if (self.p1.is_alive()):

            self.after(DELAY1, self.onGetValue)
            return
        else:

           try:

                self.txt.insert('end', q.get(0))
                self.txt.insert('end', "\n")
                self.pbar.stop()
                self.startBtn.config(state=NORMAL)

           except Empty:
                print("queue is empty")

# Generate function must be a top-level module funtion
def generatePi(q, digs, acc):

    getcontext().prec = digs

    pi = Decimal(0)
    k = 0
    n = acc

    while k < n:
        pi += (Decimal(1)/(16**k))*((Decimal(4)/(8*k+1)) - \
            (Decimal(2)/(8*k+4)) - (Decimal(1)/(8*k+5))- \
            (Decimal(1)/(8*k+6)))
        k += 1

    q.put(pi)


def main():

    root = Tk()
    root.geometry("400x350+300+300")
    app = Example(root)
    root.mainloop()


if __name__ == '__main__':
    main()
此代码示例已为 Windows 重写。
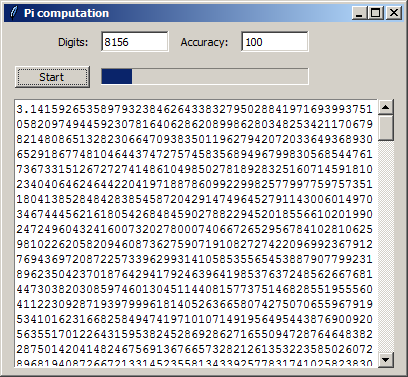
该图像显示了一个计算出的 Pi,具有 8156 位数字。由于 Queue 对象和 Windows 上的操作系统管道的限制,计算更大的数字会导致死锁。
在本文中,我们展示了如何在 Tkinter 和 Python 3 中创建长时间运行的任务;我们利用了 `multiprocessing` 模块。在程序开发过程中,我们遇到了一些技术限制。有关 Tkinter 的更多信息,您可以阅读 [Tkinter 教程](/tkinter/)。